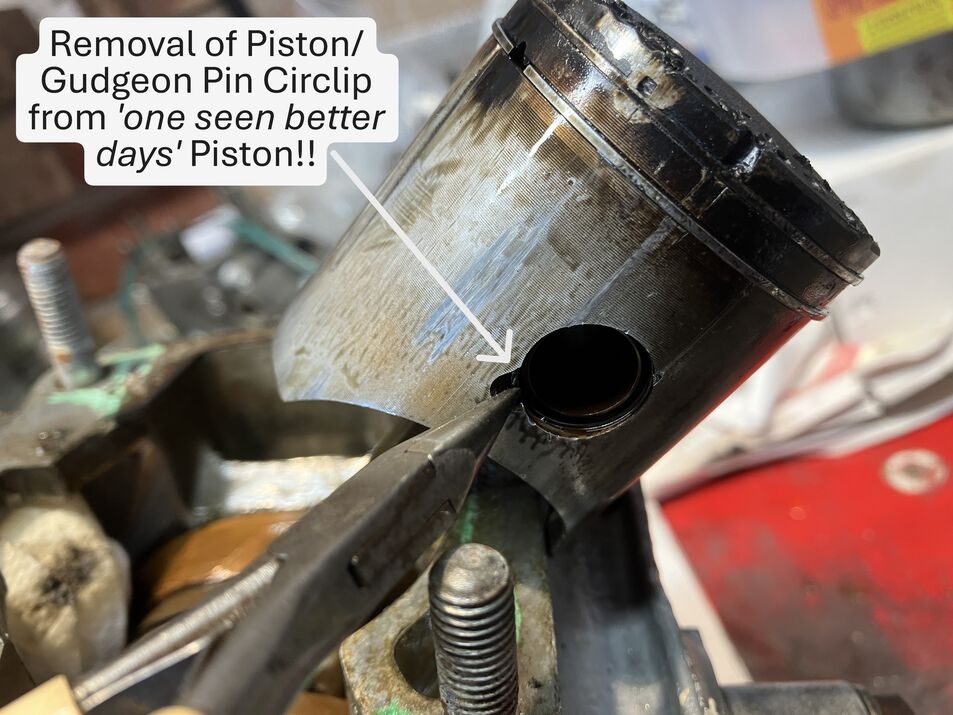
Piston Removal
Using a very small set of fine Pliers, Circlip was removed on the one side.
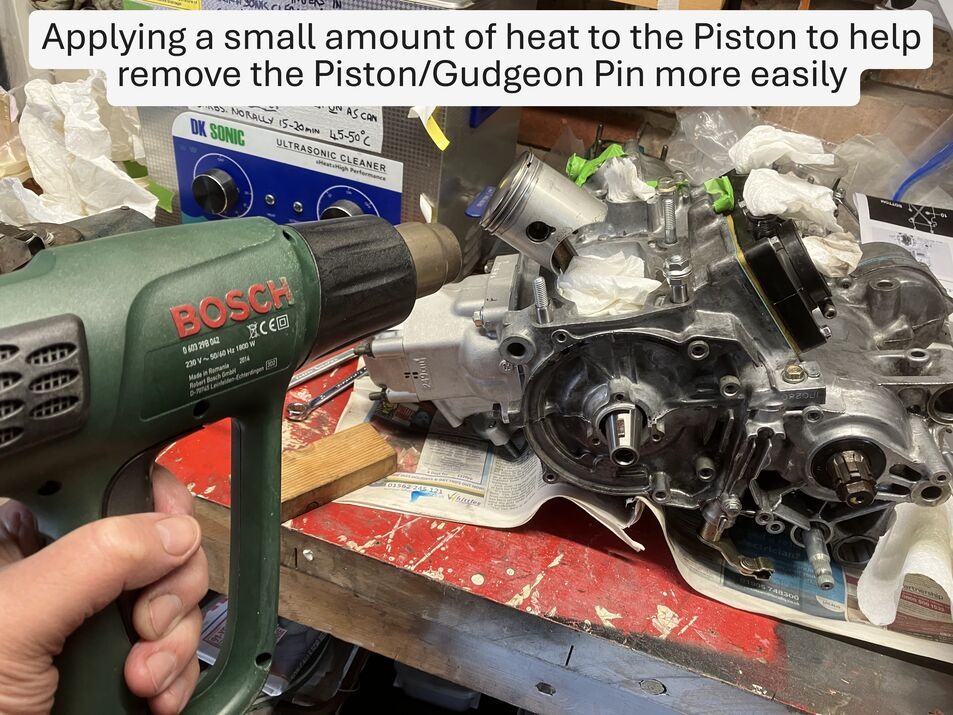
Image taken from the later rebuild stage, apply a little heat to the Piston makes removing the, Gudgeon Pin/Wrist Pin/Piston Pin or whatever its called these days, somewhat a little easier.
Crankcase Additional Components Removal
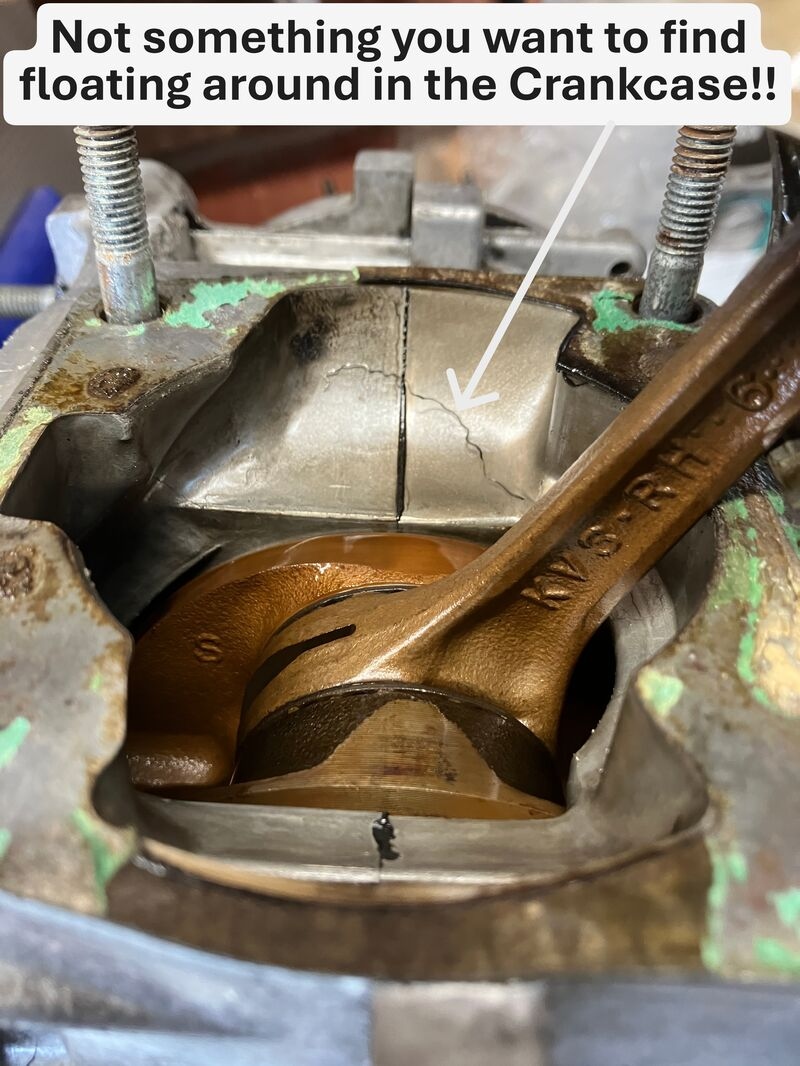
Before removing the Bolts to split the Crankcase there are a few other items to remove as follows, however, before starting I found a bit of what looks like a piece of stretched Spring most probably from one of the Engine Seals. This didnt look good and was most probably the start of the Engine demise and moon cratered Piston!
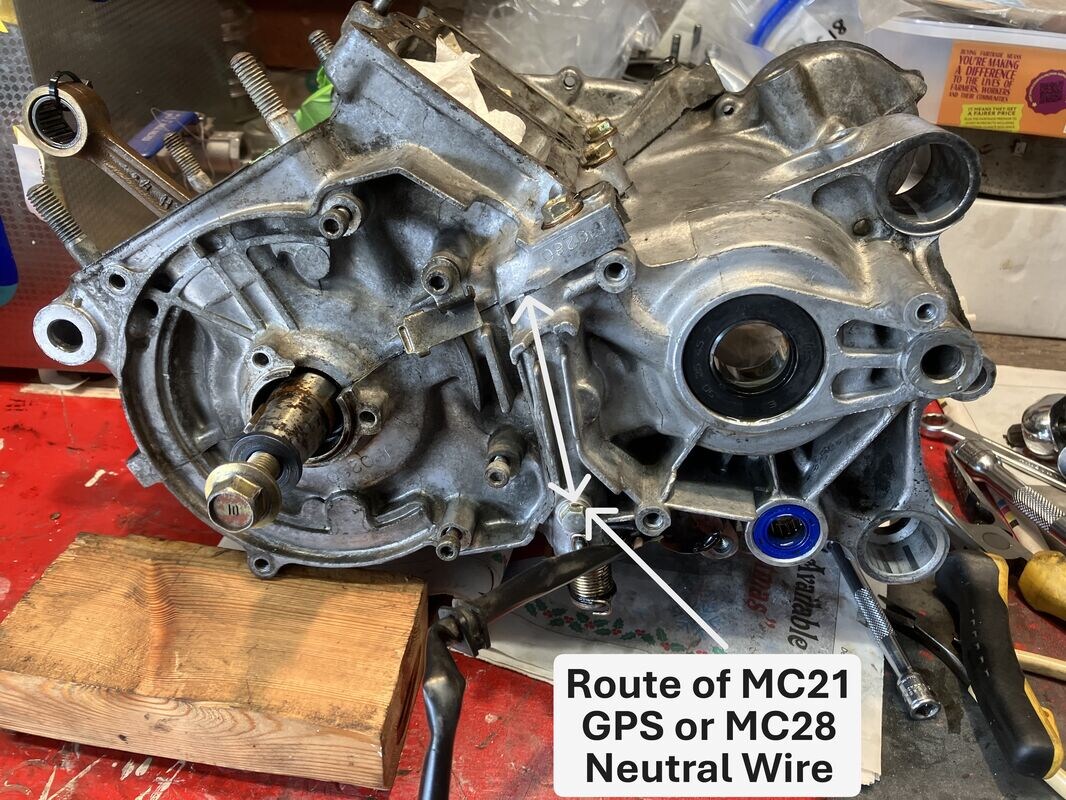
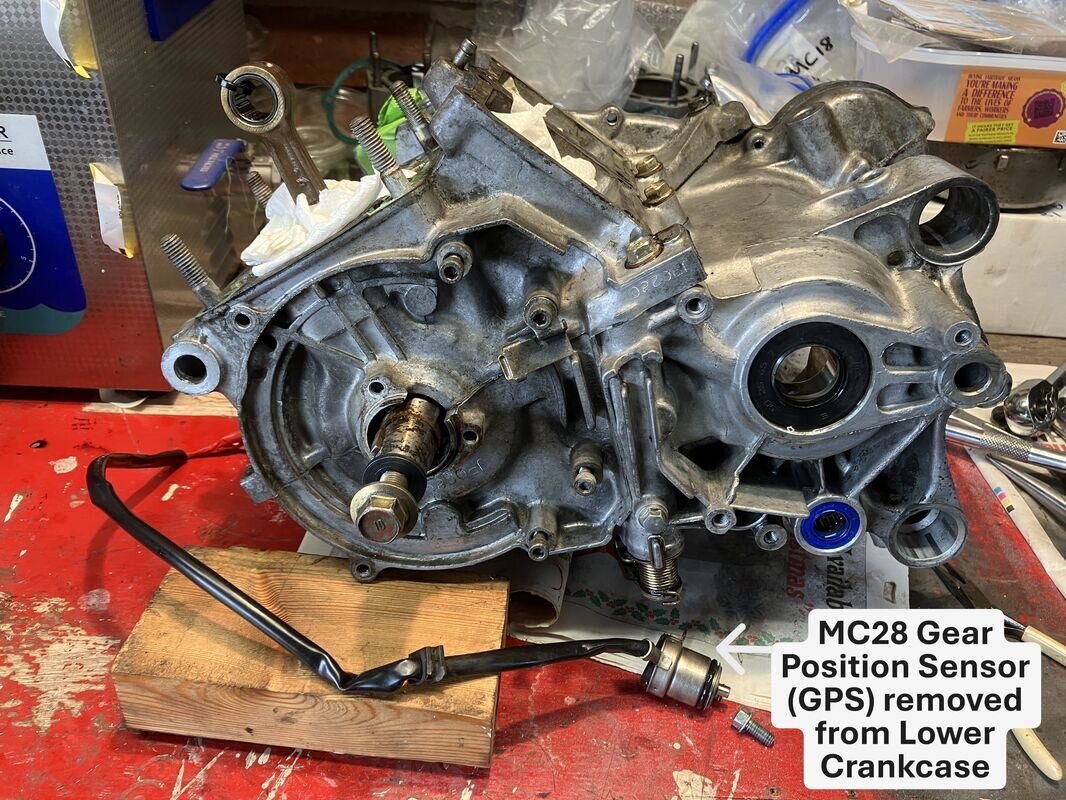
The Gear Position Sensor (GPS) was removed from the lower Crankcase and its cable routing noted (have to this these days as I have a memory like a sieve).
Testing the GPS it was found to be totally unserviceable; however, even if it was serviceable, it still wouldnt have worked, but may have saved a few pennies later on (See Post 'Gearbox Cassette Removal' above), so a new GPS had to be obtained.
Note: JAUCE, WEBIKE, AMAZON JAPAN & WEMOTO supply these when in stock. Its a pity you cant get a new MC28 Neutral Switch as that is all that is needed for the MC18.
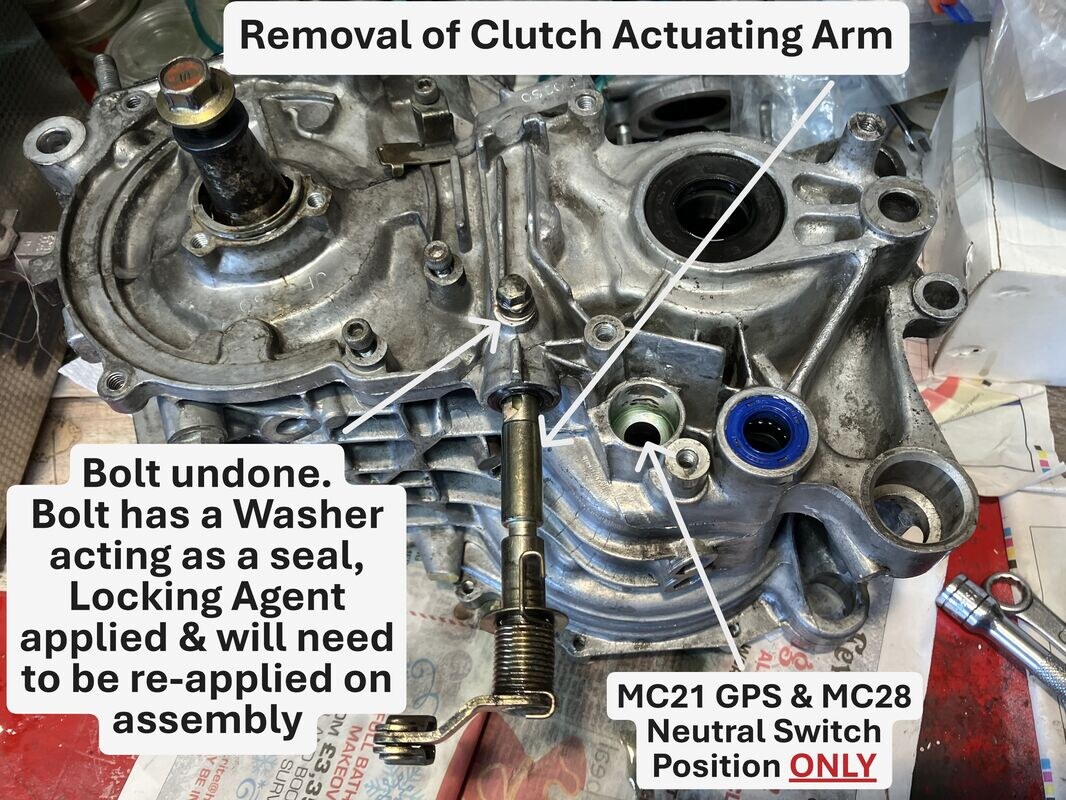
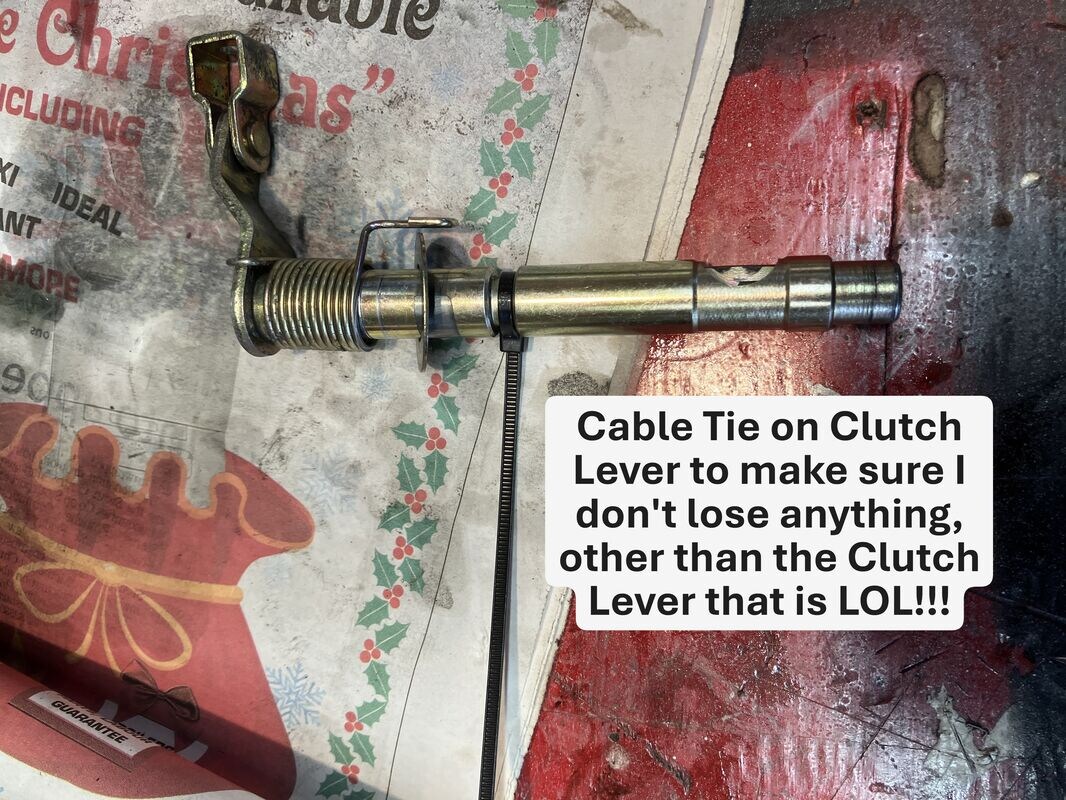
The Clutch Actuating Arm was removed as the Oil Seal needed replacing just to make sure. Some heat on the Bolt holding the Clutch Actuating Arm may be needed as the thread probably had some Locking Agent applied.
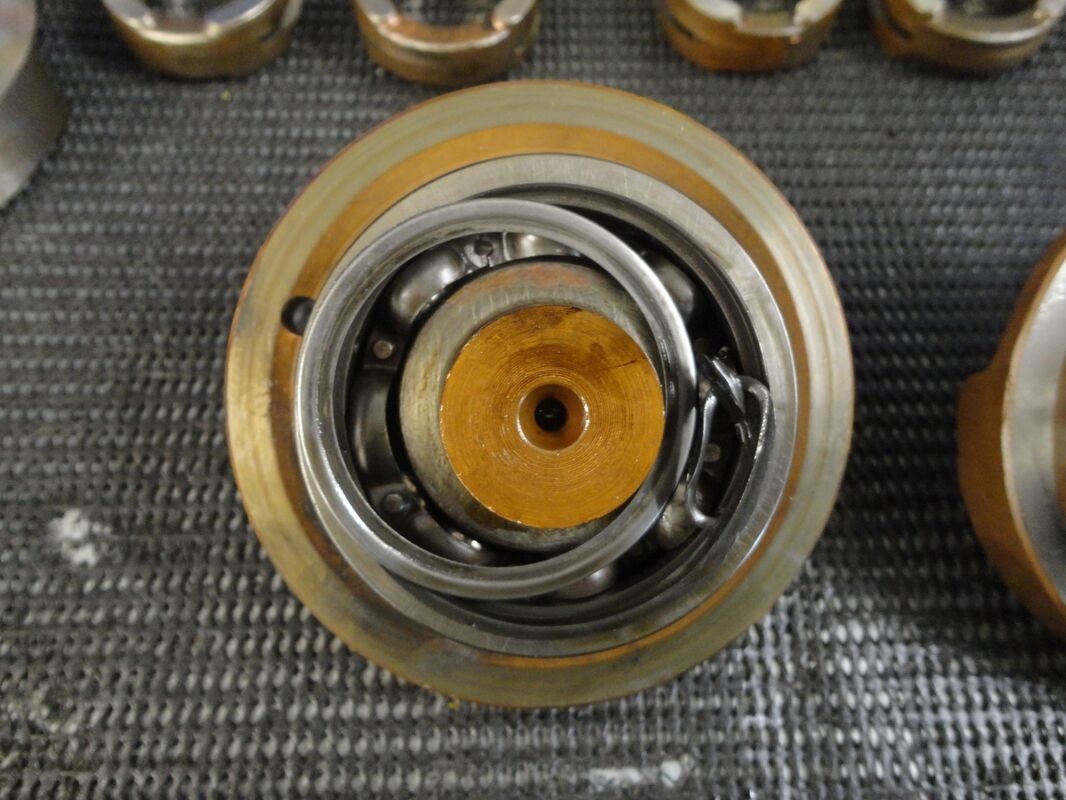
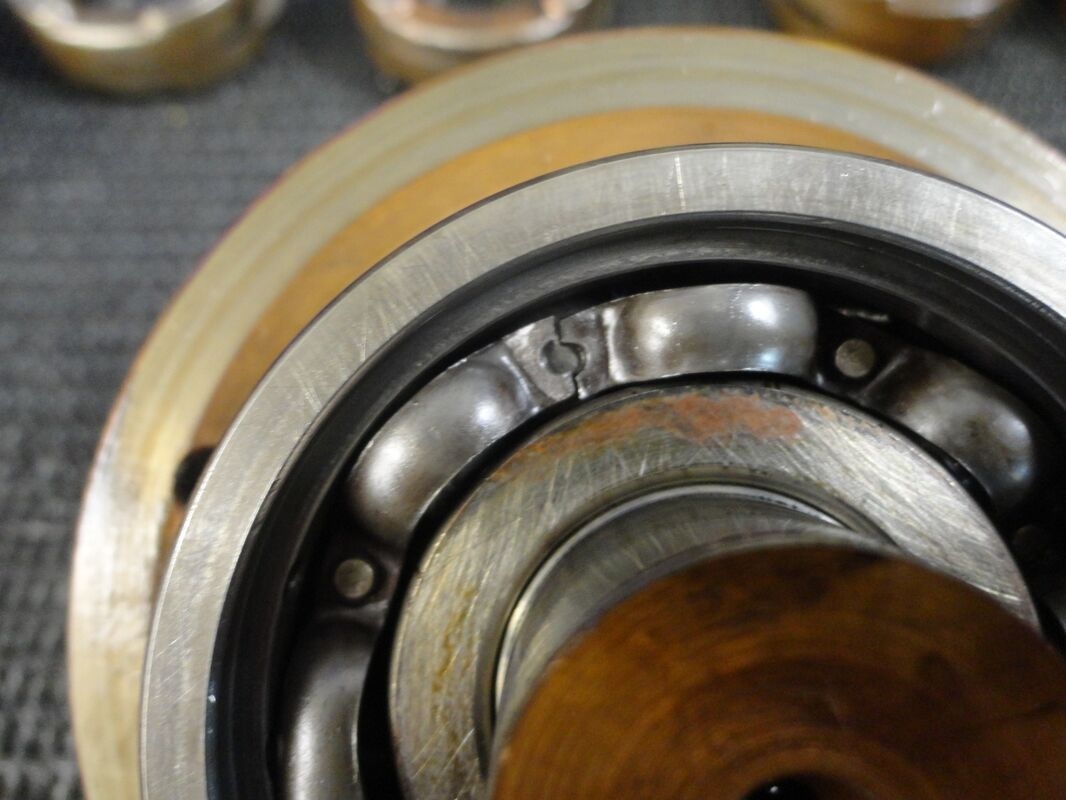
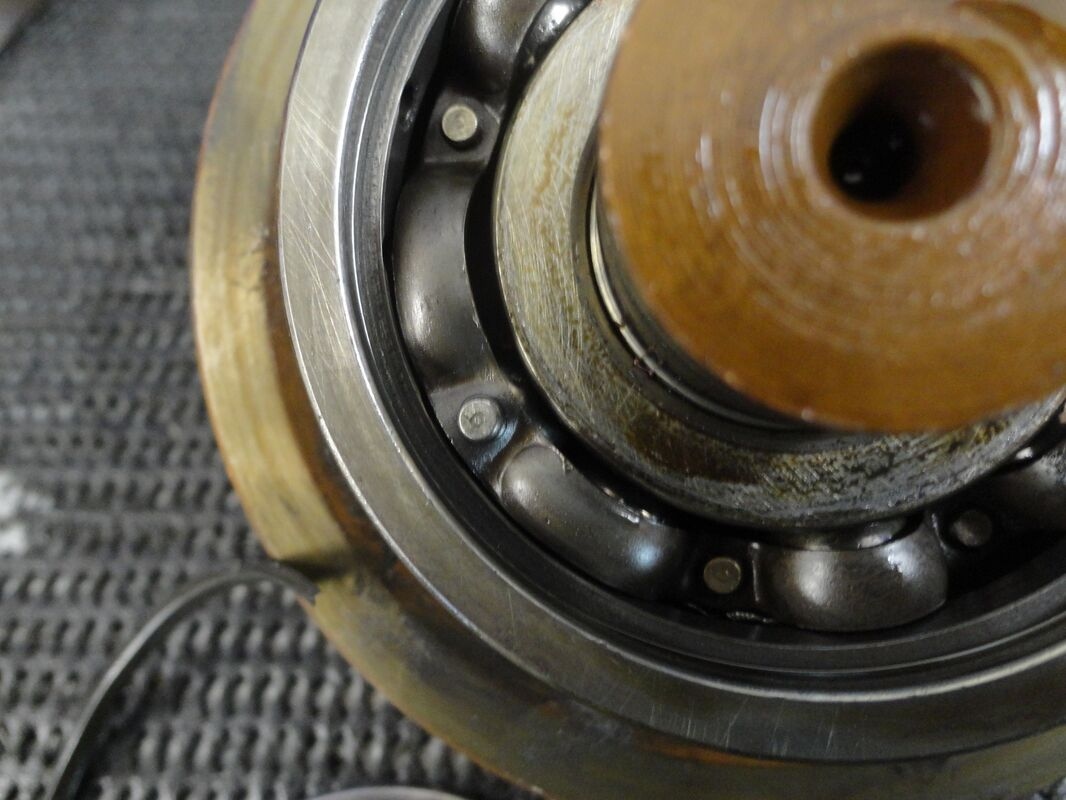
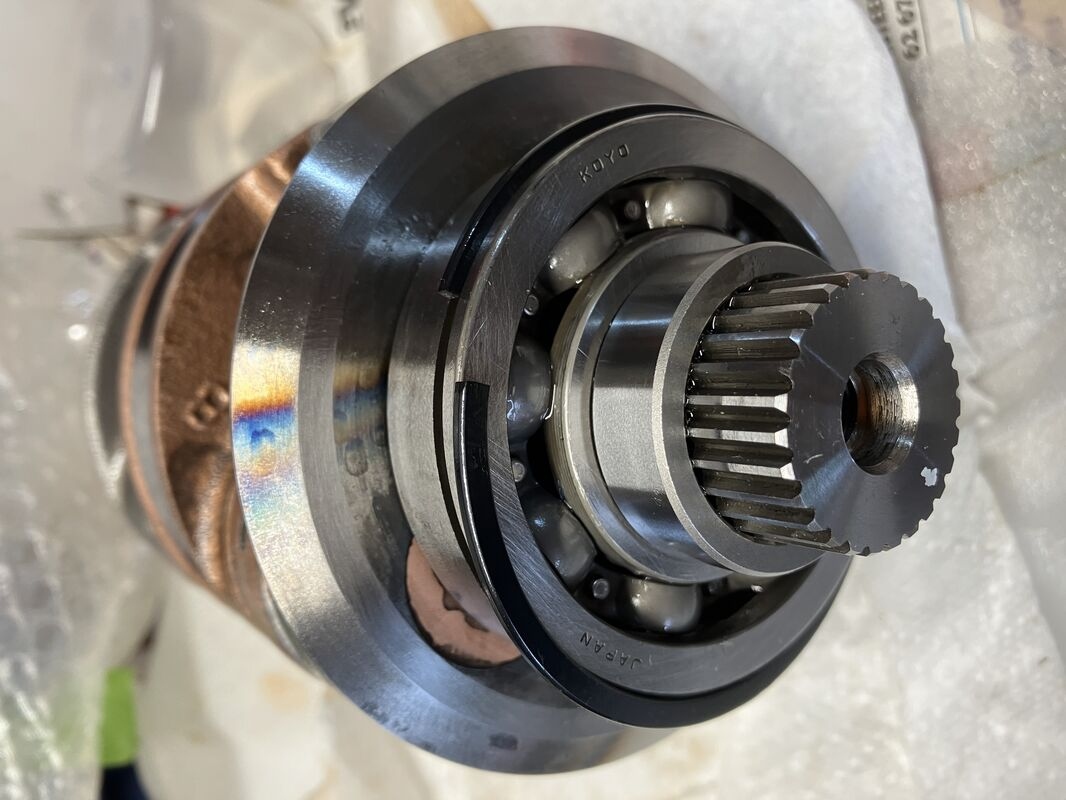
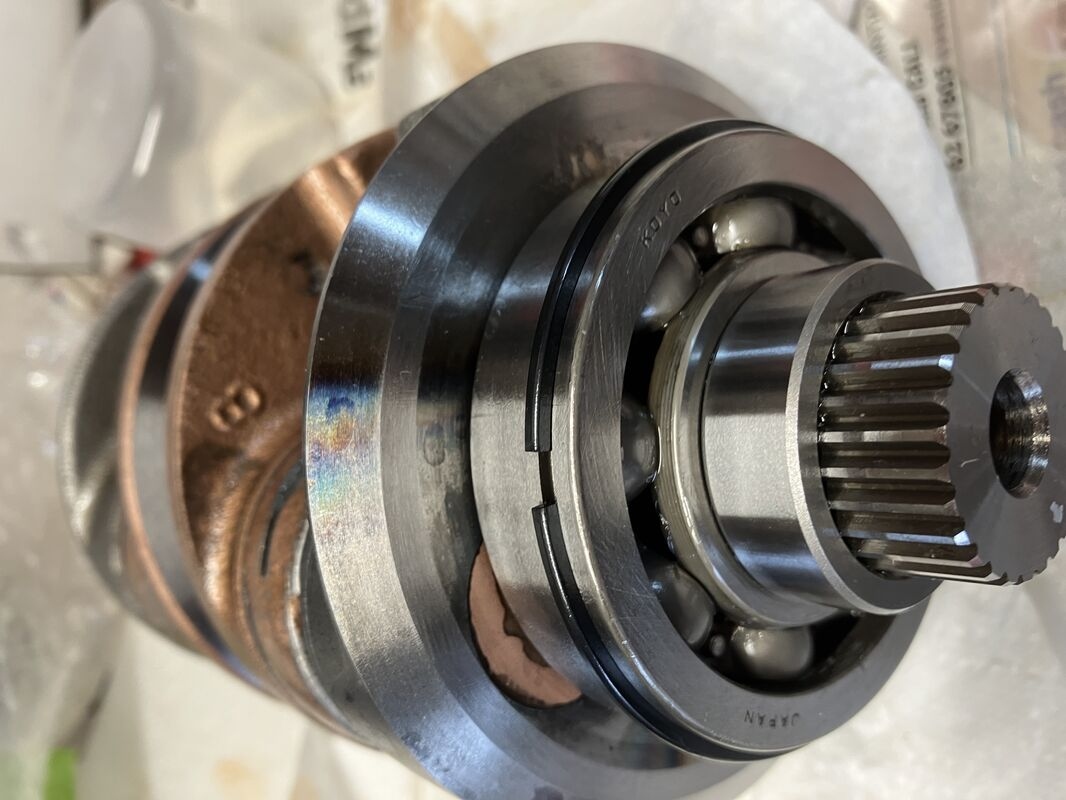
Was a ball actually missing from the bearing? Hard to comprehend if one did then got loose into the crankcase as there really is no space for a ball to get free. However, once an object gets into the crankcase it can get sucked into one of the ports and get pulled into the top above a piston leading to the observed damage.
From the pic i get the sense you un-pressed the crankshaft. Any chance you checked the crankshaft run out before separating it? Maybe impossible to do with the bearing the way it was. If a crank is not true, then the bearings can be stressed causing what you found. But that's just one possibility. The bearing could also have had a cage that was defective or just plain worn and came free, but that's highly unusual. Check for signs of excessive heat around the bearing, seal and crank pins. For sure make sure the new or rebuilt crank drops into the case evenly...Basically making sure the case is still true.
Lastly, what was the condition of the seal? Does it show signs of heat damage? If the spring is what you found in there, it may have been torn off when the bearing cage came apart. Or the seal spring came off, it could have killed the bearing which led to implosion. You may never find the root cause on this one.
Hi ericandchi many thanks for all that information much appreciated, this is a complete & total learning curve for me, so I am very grateful for all the help and Guidance .
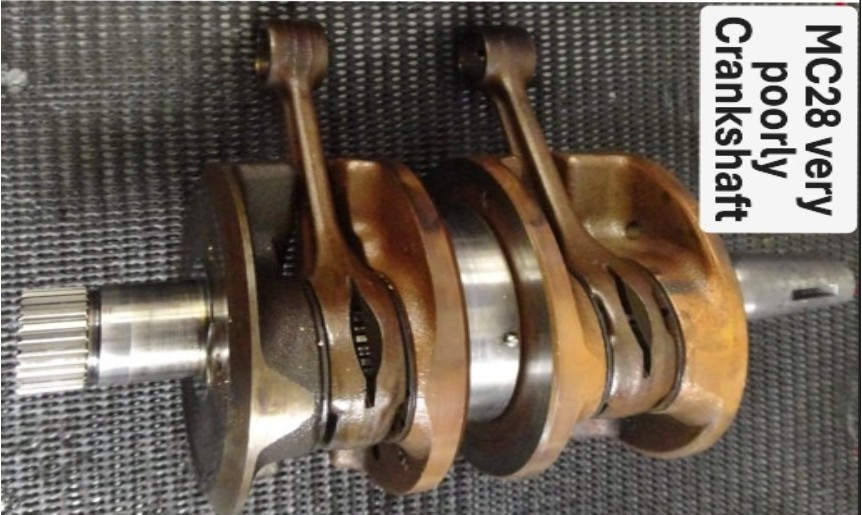
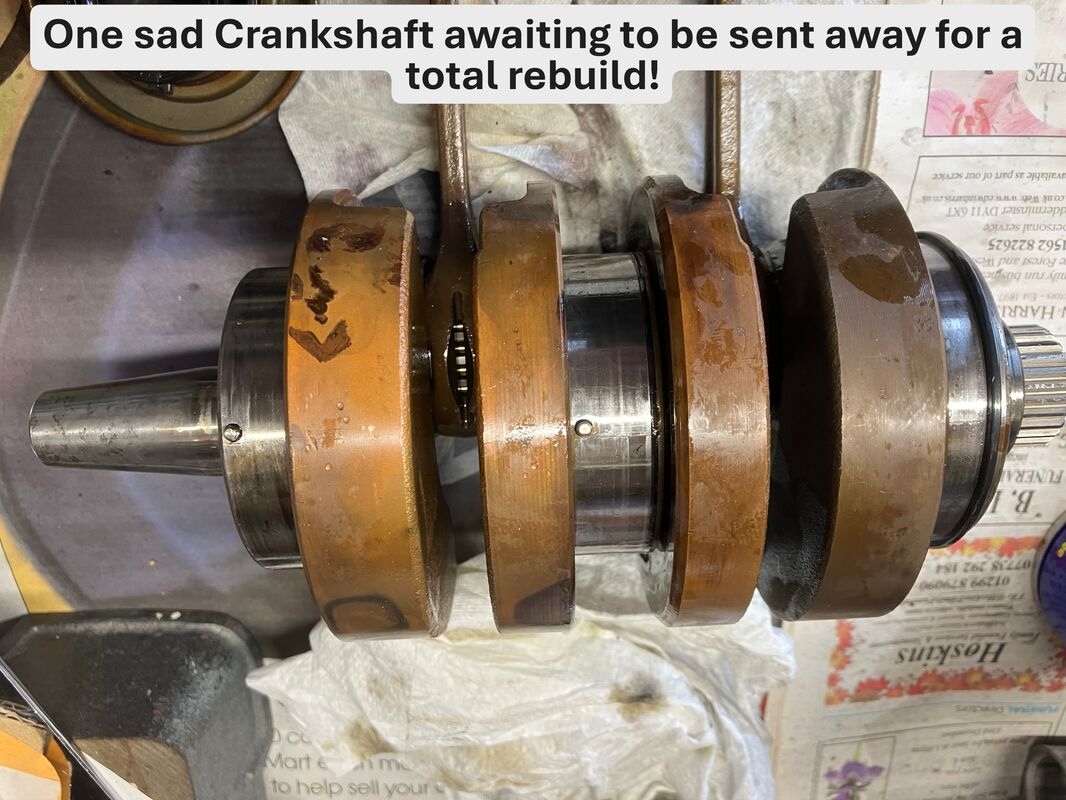
I had the Crankshaft professionally rebuilt, I do not possess those sort of skills or tools Im afraid, therefore unfortunately I only have the pictures that I managed to obtain & a verbal report that the Crankshaft was fine to be re-built.
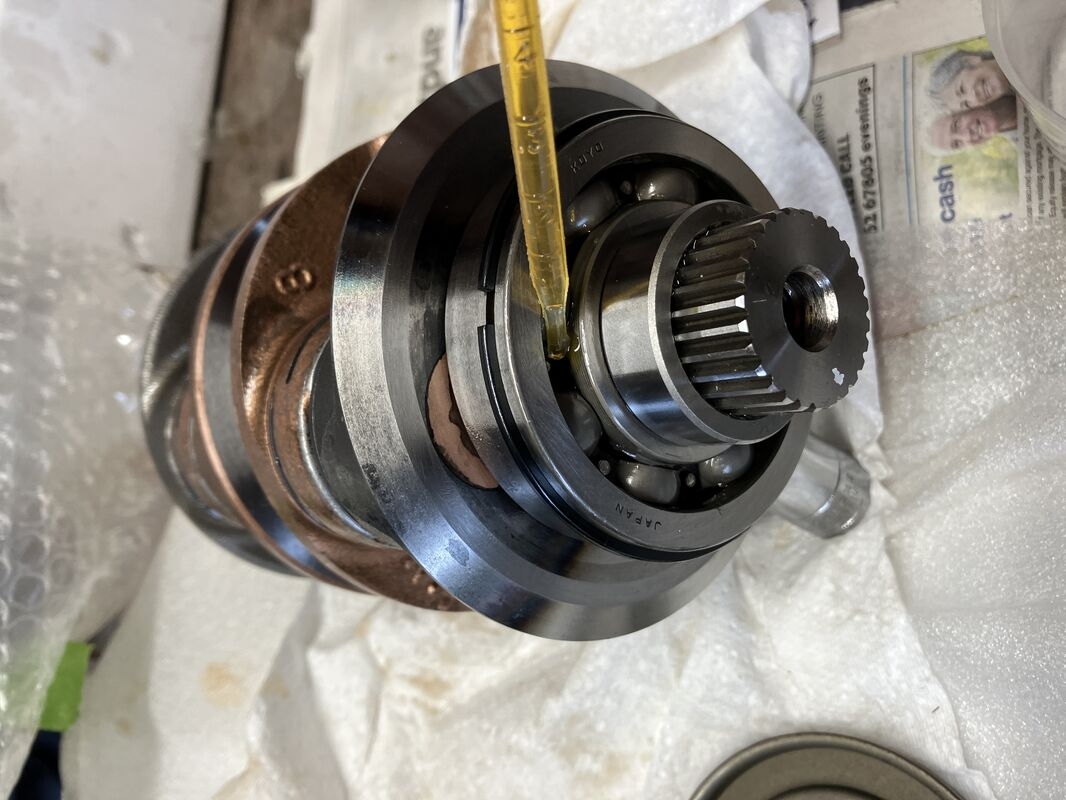
Ive included a few extra pictures showing how the Bearing Cage is fractured & some damage to the Cage itself if that provides any sort of clue.
Sorry I cannot be more helpful or forthcoming, I am writing this Rebuild journey somewhat after the event with the hope that the images may provide some help to those who are in the same boat as me so to speak and also as an aide memoire to when I do my NSR250 88 MC18.
Once again many thanks, hope the pictures shed a bit more light on what might have happened.
Typical 89-96 centre bearing. Never seen one come apart yet, that wasn't wrecked. Definitely the [later] NSRs weak point. _________________ Andy.
NSR-WORLD.COM
Please keep all responses to Forum posts on the Forum so that others may benefit.
Please DO NOT PM me for technical advice. My time is precious, and you will probably receive a faster response on the Forum anyway.
Very interesting though depressing, cheers for that Andy.
I wonder why Honda changed the design if the previous NSR Crankshaft Centre Seal & Bearing arrangment was more robust!
Possibly cost I guess.
Regards
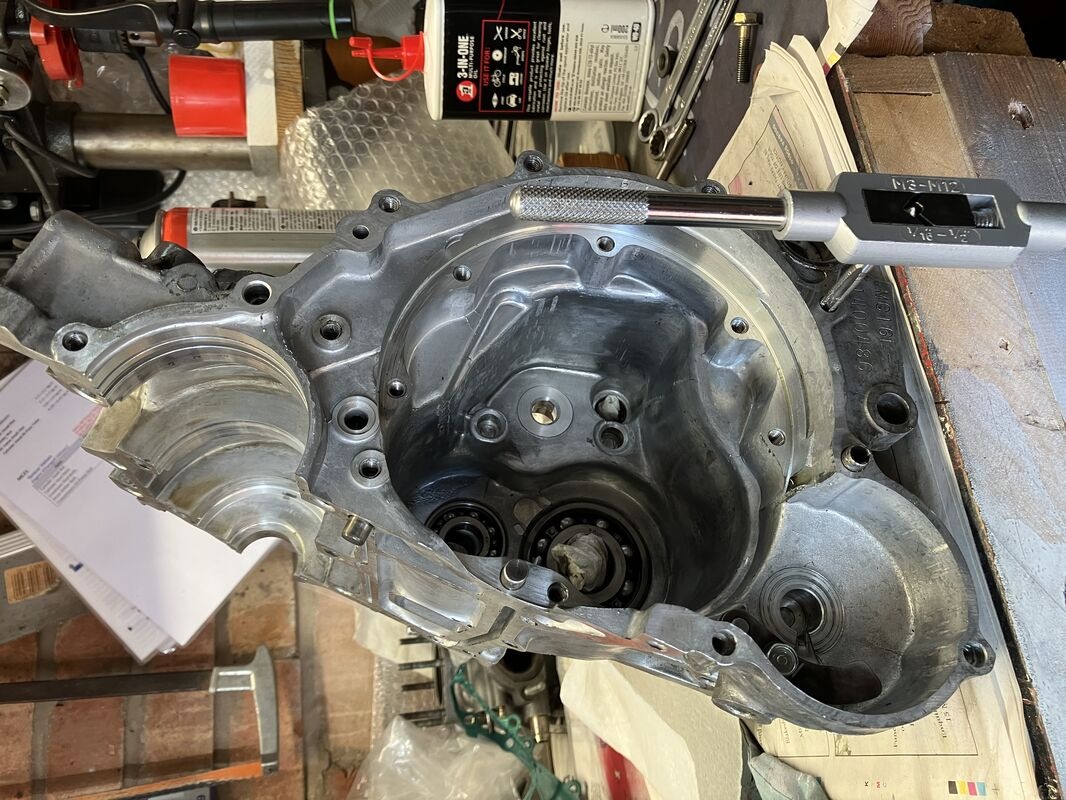
Crankshaft Removal
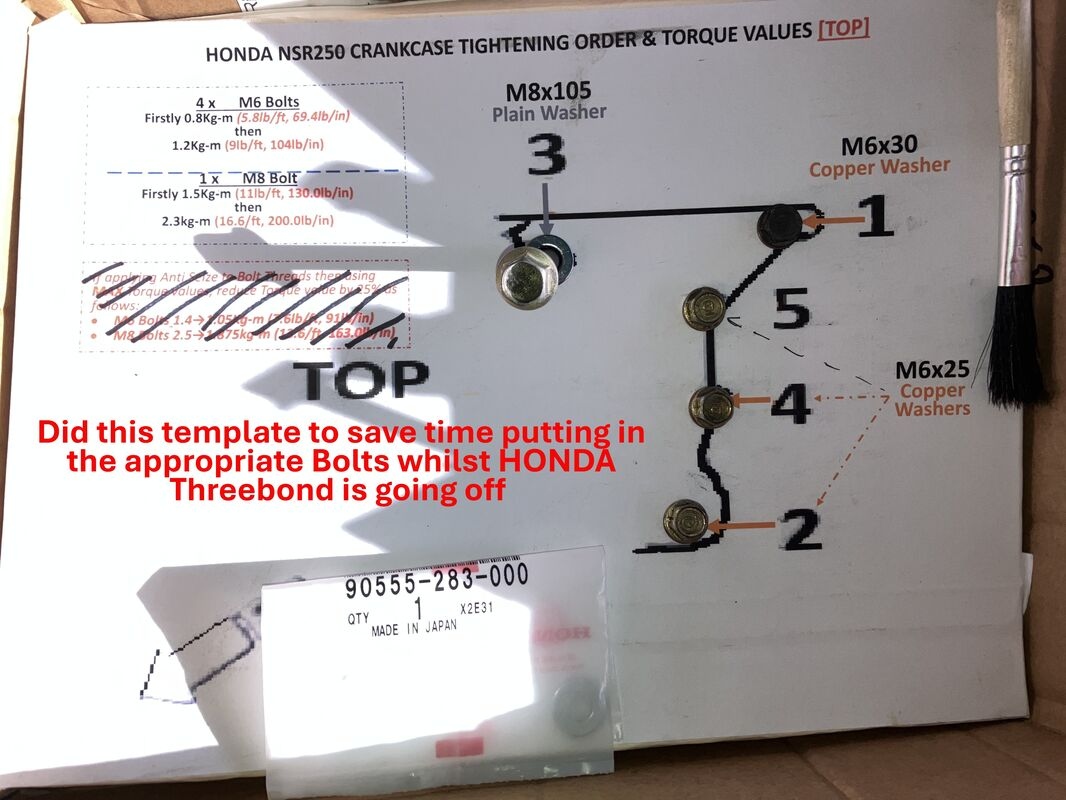
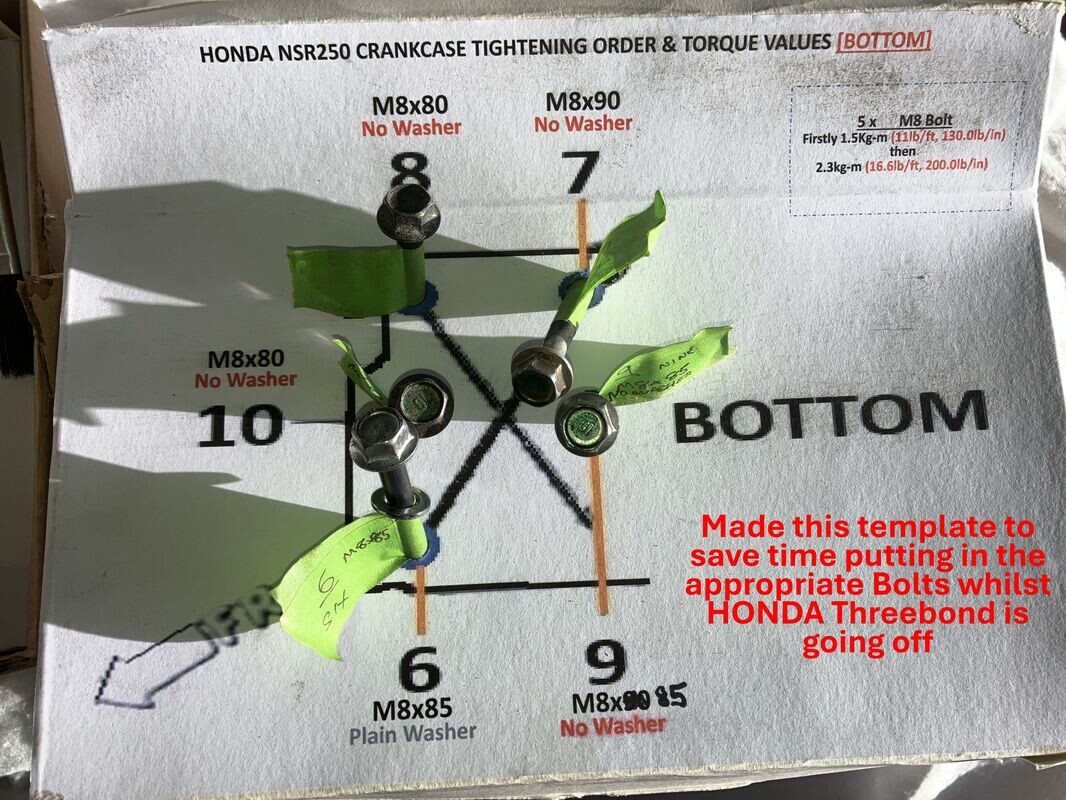
The Crankcase Bolts were undone in reverse order to that shown in the Service Manual in 2-3 steps. The Bolts were then cleaned and placed in a Cardboard template ready for later assembly (Dont laugh, said I got a memory like a sieve and yes I am being a very pernickety but, will save me time sorting out which Bolt is which when assembling LOL).
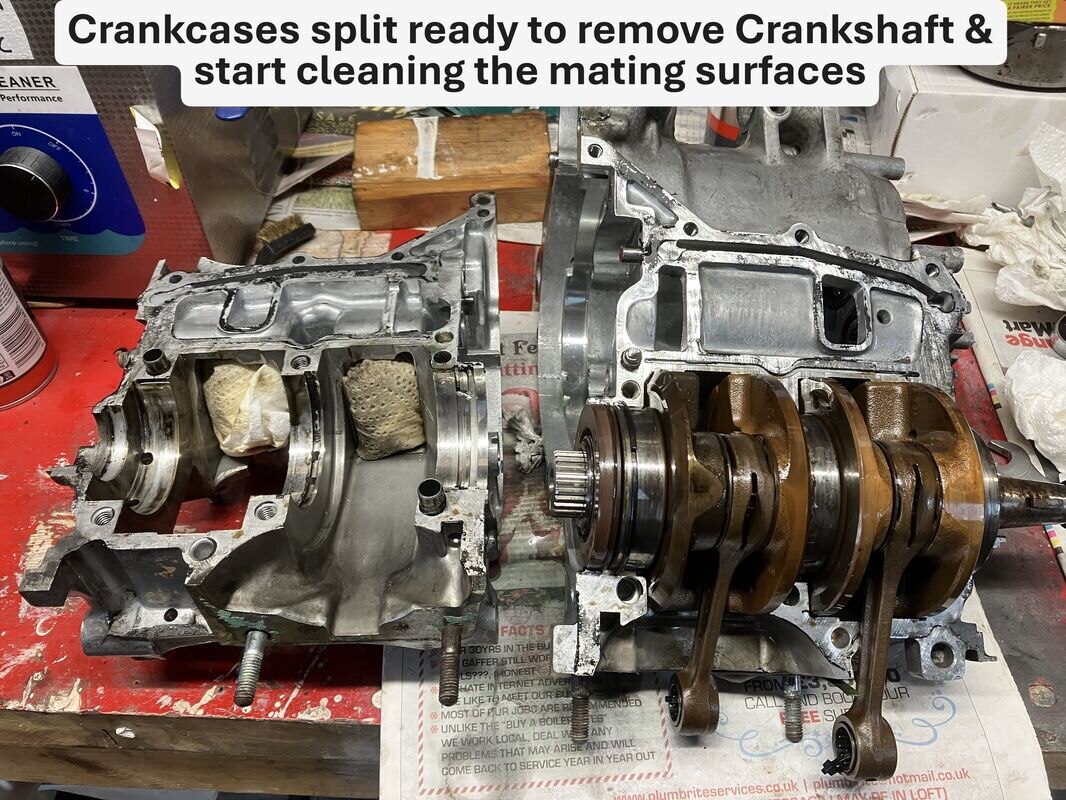
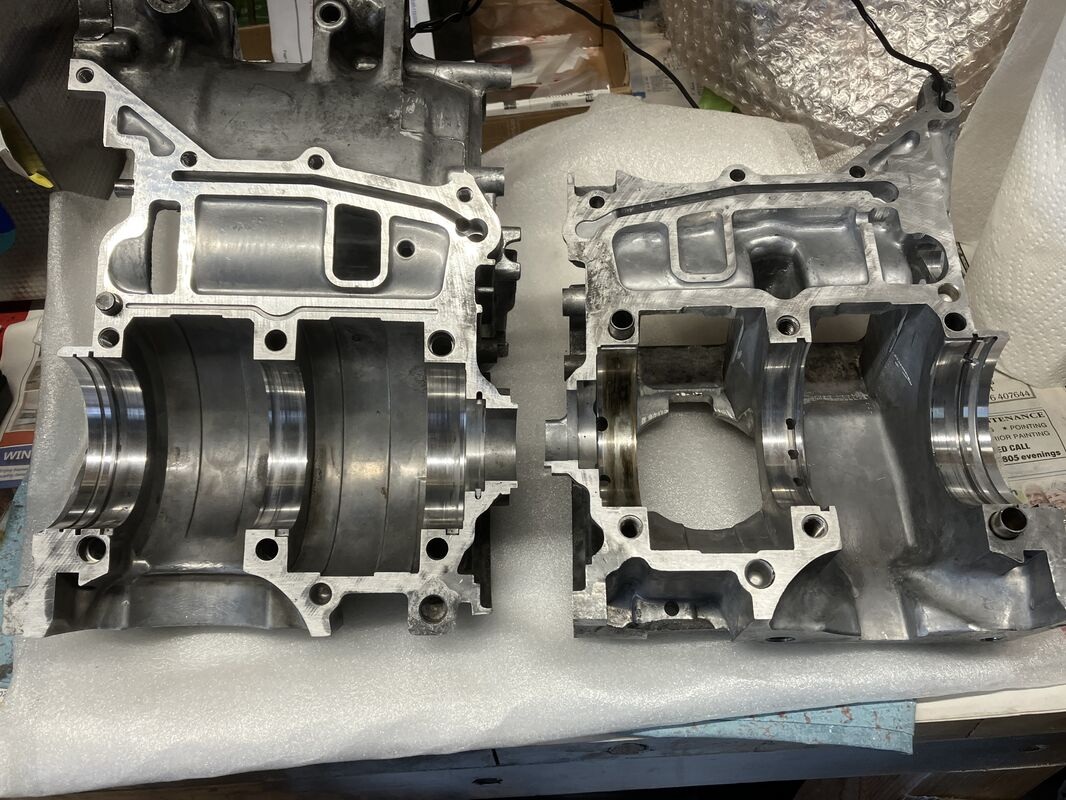
Following NSR WORLDs advice in their Rebuilld Section https://archive.nsr-world.com/ and using a soft block of wood, the bond between the 2 halves of the Crankcase were split by applying some leverage to the underside of the inlet manifold, and on the lower cylinder, by tapping the casing upwards.
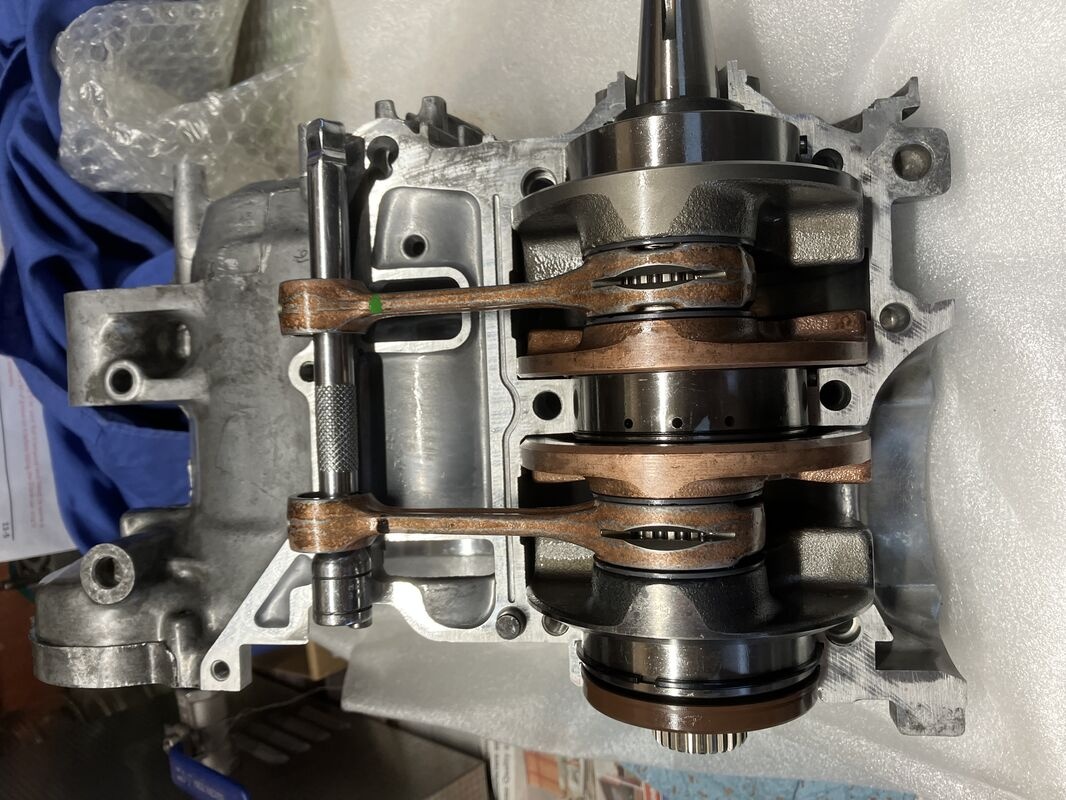
As stated previously the offending Crankshaft was removed and sent away for a total rebuild (little did I know at the time what had actually gone so terrible wrong with the Centre Seal & Bearing. Please see images in above posts).
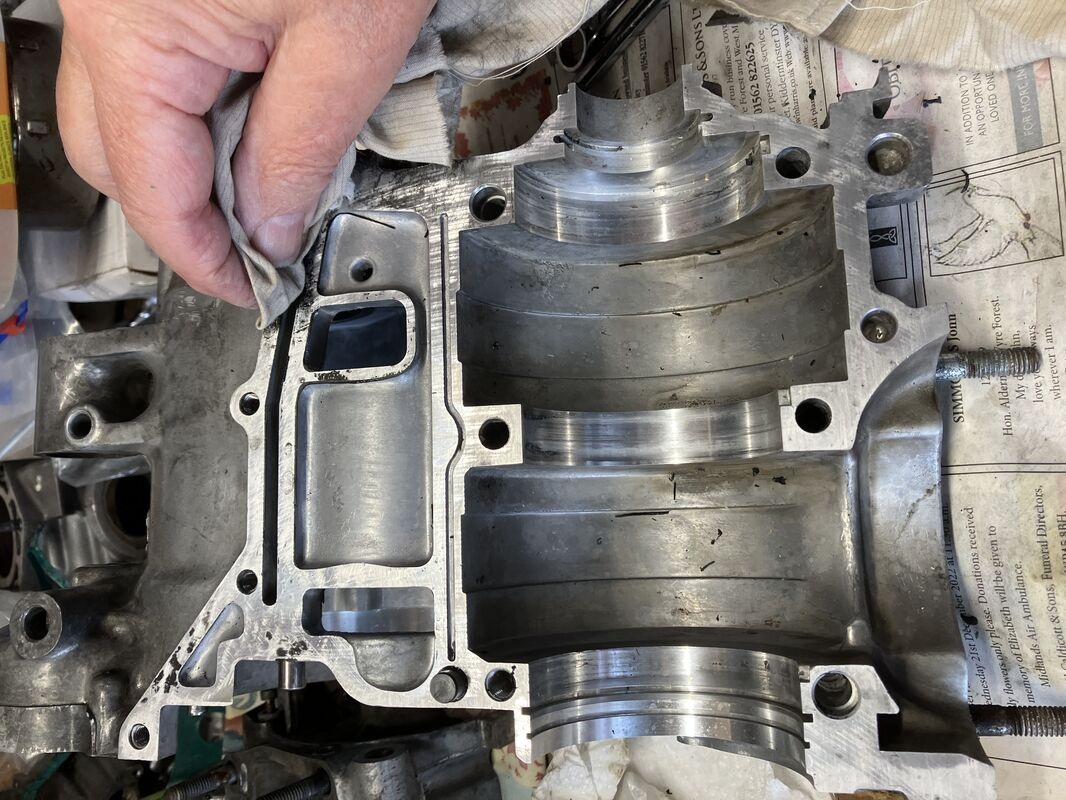
Cleaning & Removal
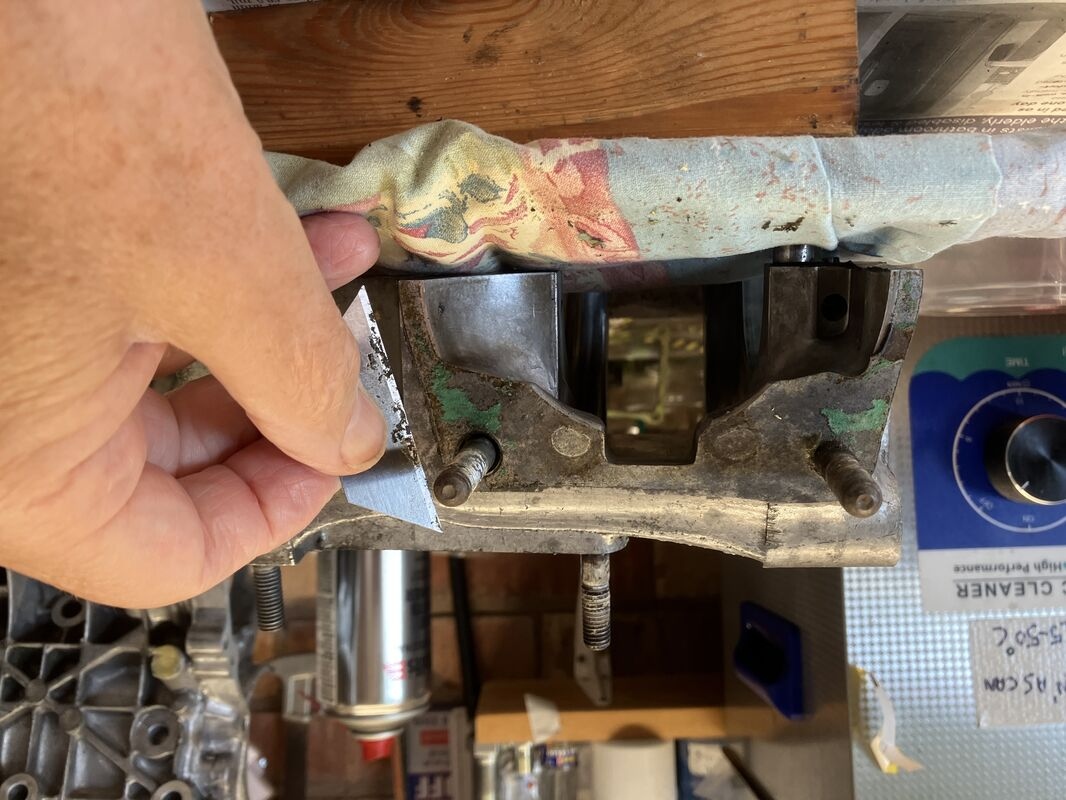
Cleaning the Crankcase/Cylinder Barrel mating surfaces was next, however, I tried in vain to remove the Crankcase to Cylinder studs, using repetitions of heat and plenty of KROIL Penetrating Oil left soaking for more time than I would have liked, so decided to carry on cleaning the mating surface until I could get the Studs out.
However, I gave up in the end, time & galvanic corrosion got the better of me and PJ Motorcycle Engineers in Wolverhampton did it in the end, they have far better tools and experience for the job than me.
Initial clean of Crankcase mating surfaces to remove the old Sealant using an old piece of cloth soaked with Brake Cleaner or Meths & yes should have been wearing some gloves.
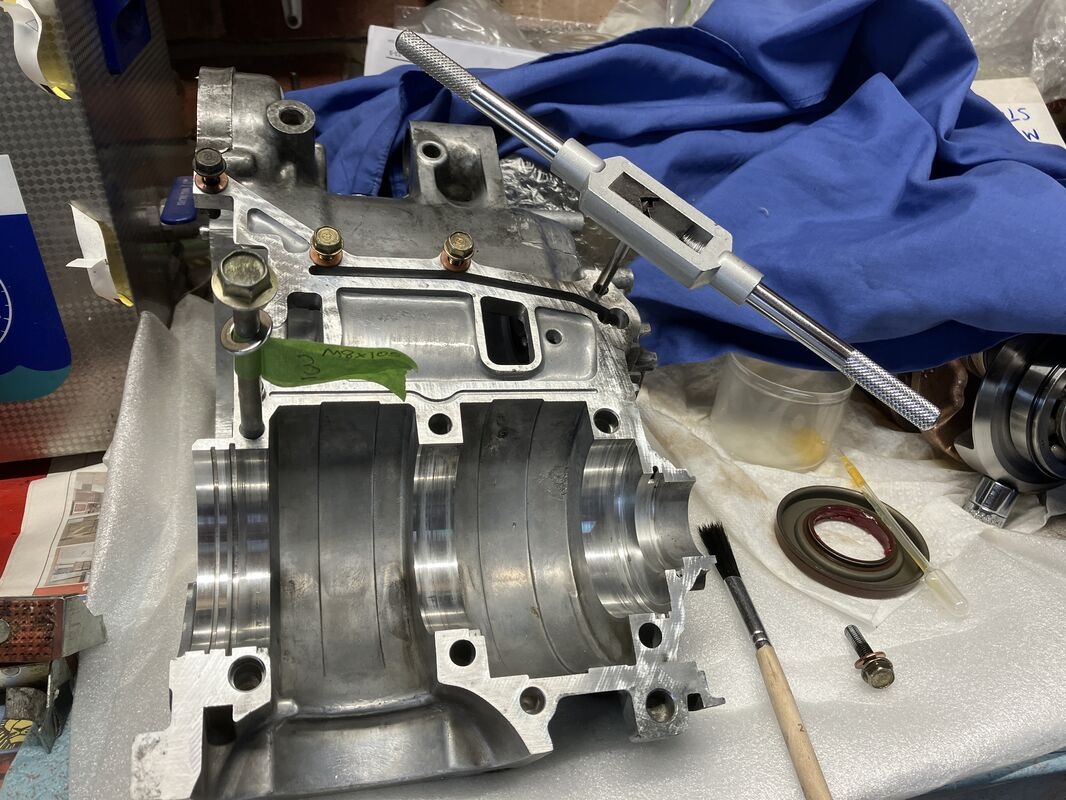
Just to make sure everything runs smoothly (that will be a first) using M6 & M8 Taps to clean out the Threads in the Crankcase.
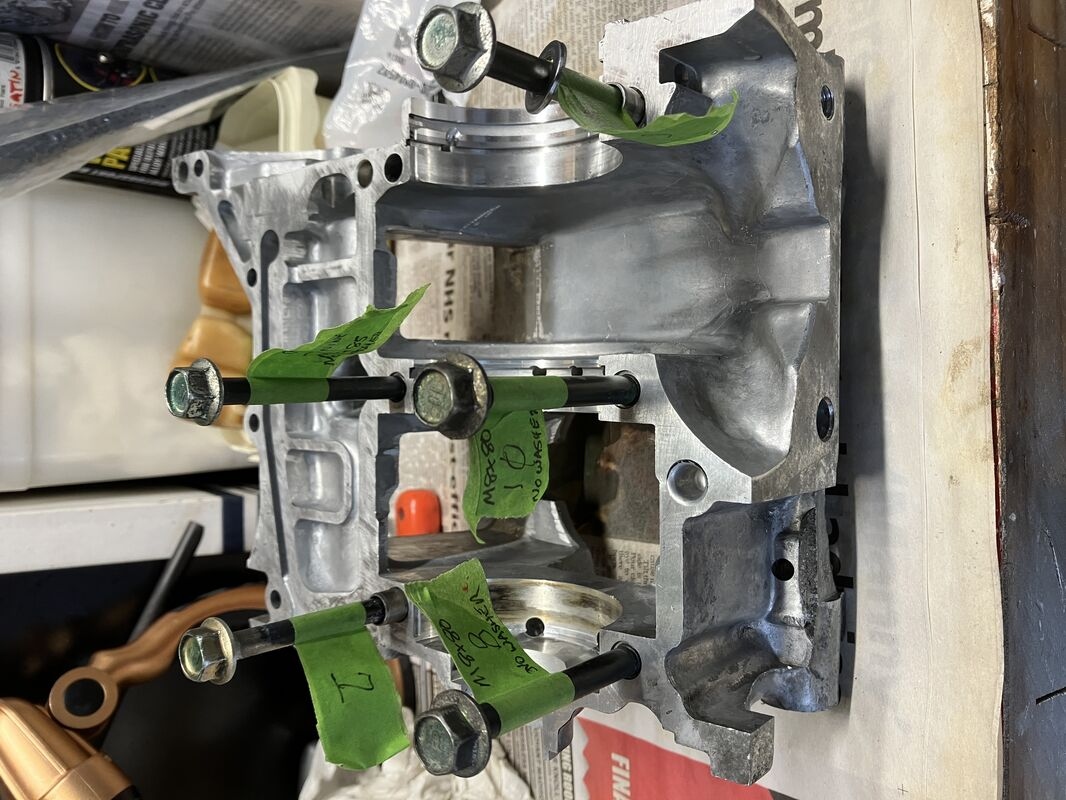
A quick dry run with the Crankcase Bolts just to make sure they all screw in freely.
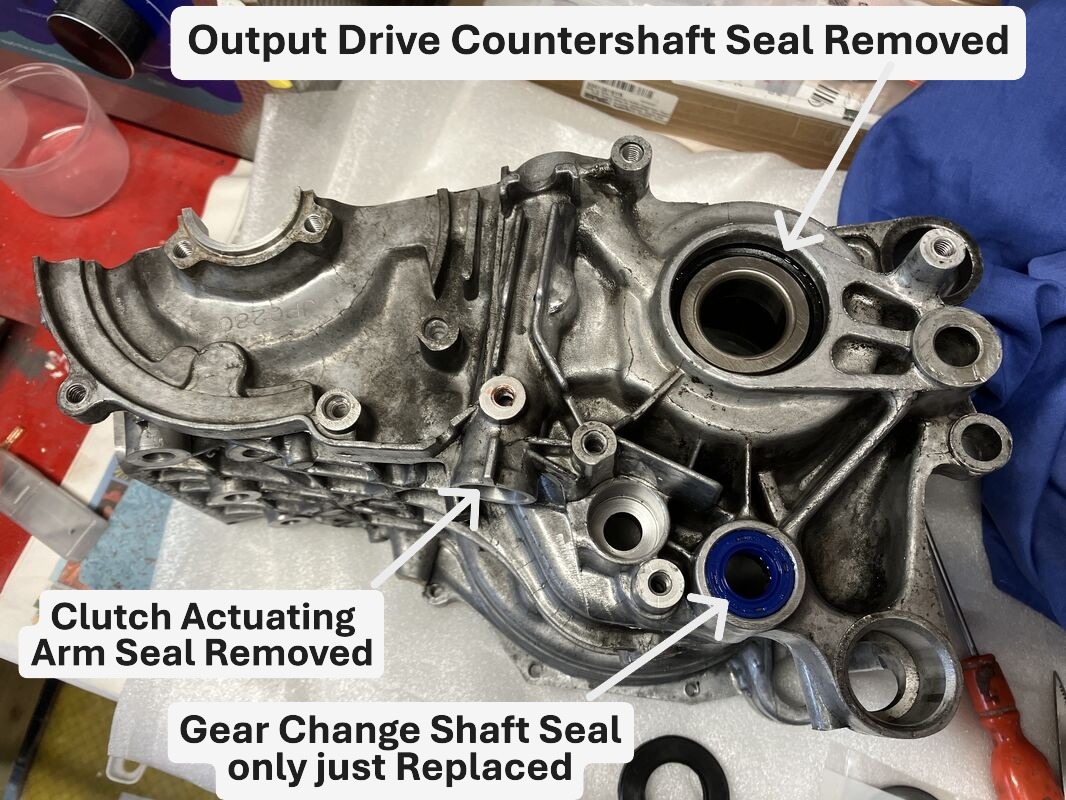
Install New Seals
It's a false economy not to replace old Seals whilst the Engine is at this stage, it's a lot easier to do & saves a lot of heartache later on.
Output Drive Countershaft/Clutch Actuating Arm Oil Seals Removed (left the Gear Change Shaft Oil Seal as it has only just been changed in situ due to a slight Oil Leak).
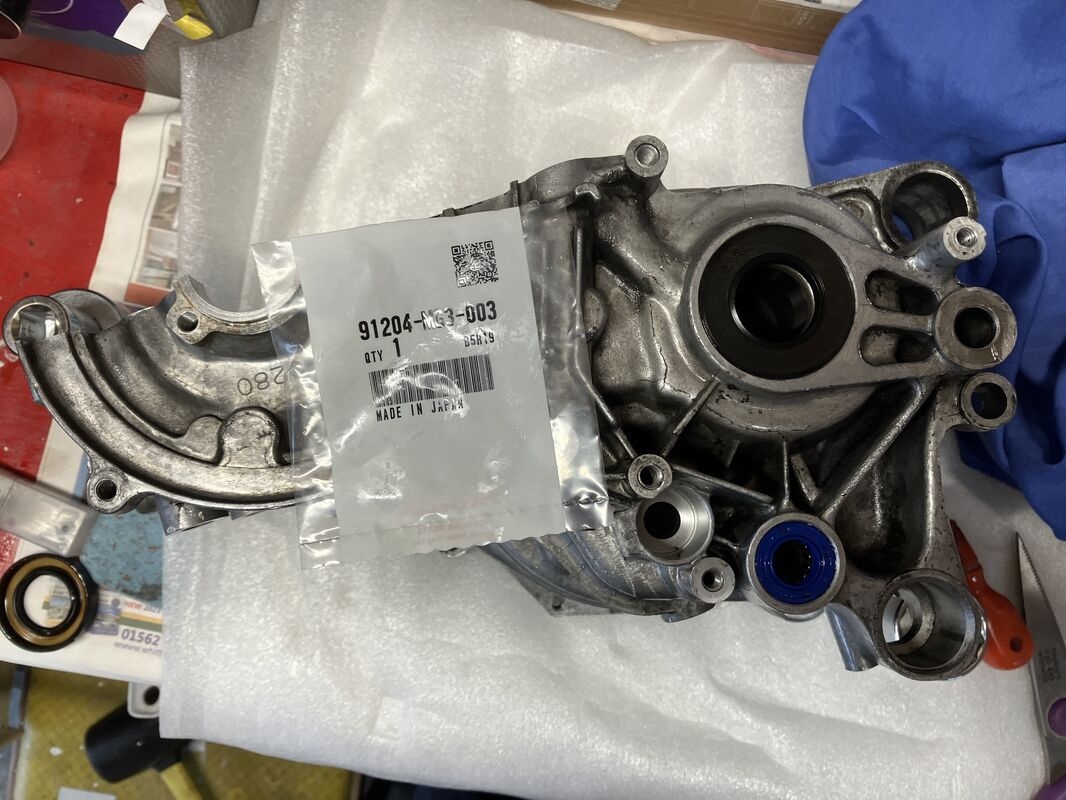
New Output Drive Countershaft/Clutch Actuating Arm Oil Seals Fitted.
Final clean of Crankcase mating surfaces ready for the application of HONDA Threebond.
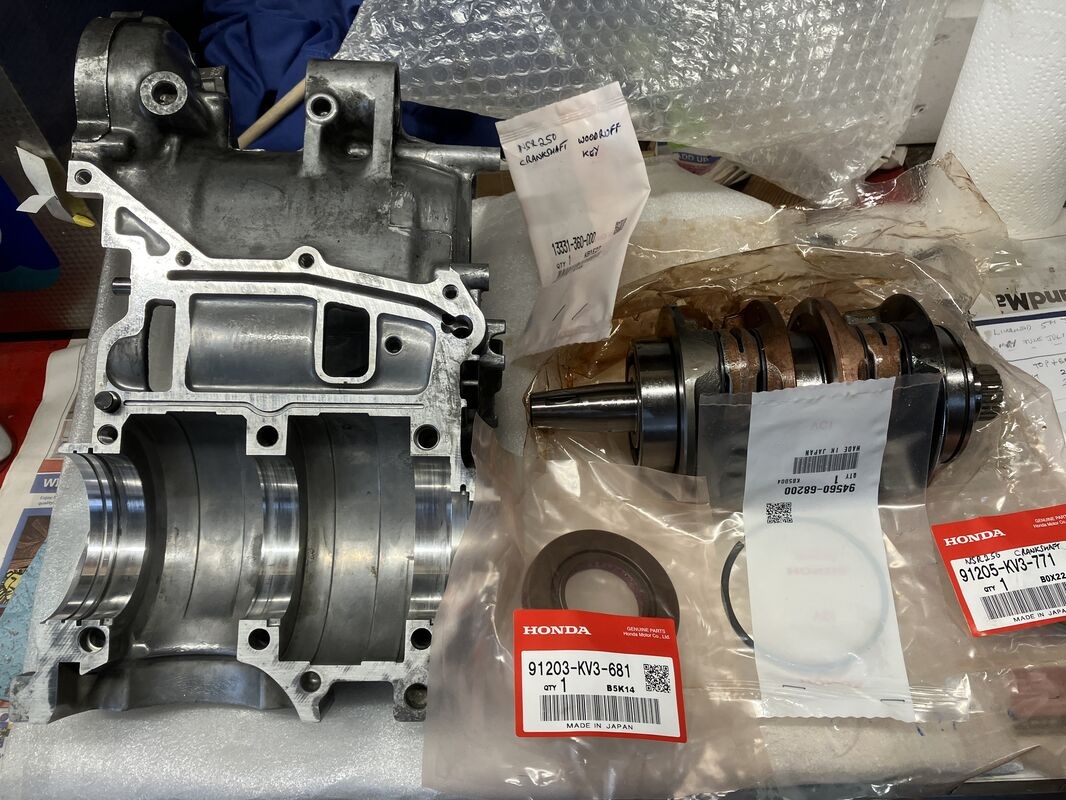
Crankshaft Assembly
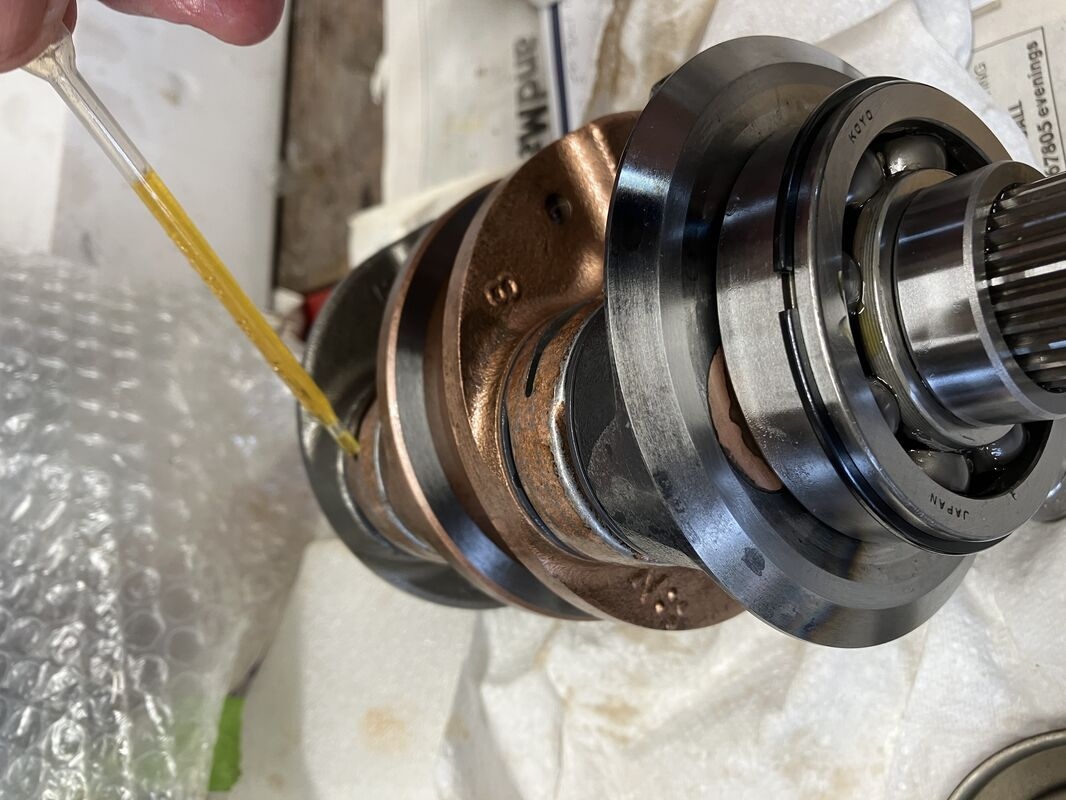
Crankshaft Seals & Snap Ring all ready for assembly (Note: Luckily the Crankshaft 'O'-RING, 60.7 x 1mm Part No 91301KV3771 is already in place on the Centre Bearing).
Installing Snap Ring
All the Bearings on the Crankshaft were given some 2T Oil for initial start up.
As per NSR World recommendations the Crankshaft & Seals were given a preliminary Dry Run, making sure everything was bedded in & aligned correctly with the Crankcases.
You cannot post new topics in this forum You cannot reply to topics in this forum You cannot edit your posts in this forum You cannot delete your posts in this forum You cannot vote in polls in this forum You cannot attach files in this forum You cannot download files in this forum