Although not strictly part of this re-build I had a spare Petcock Valve from my NSR250 MC18 R2J (the same Petcock as in the R5K) that I thought I would have a go at renovating it (yes, Im of that generation that hates anything going to waste if it can be repaired). So, I bought a re-build kit from NRP Carbs and Diaphragms, which comes with a complete set of instructions, and set about it with mixed results (mainly from my own wrong doings I might add).
Note: Old Seals are shown below after replacement, but this is what basically what comes in the kit.

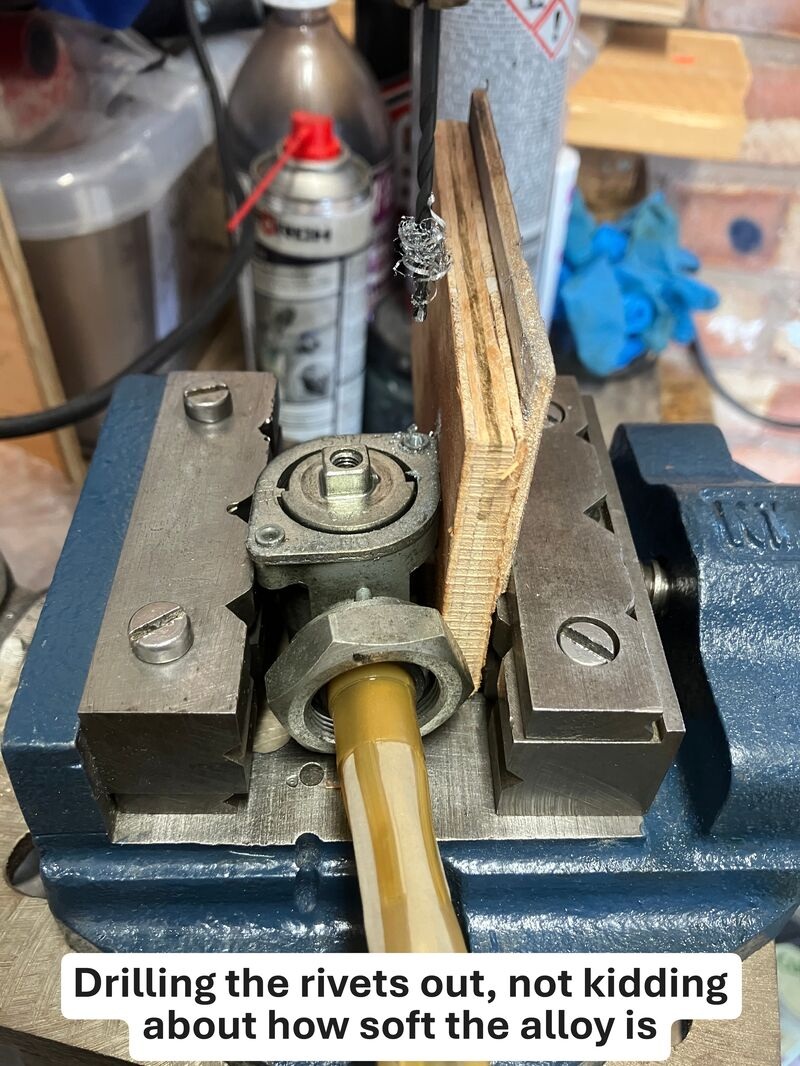
I set the Petcock Valve up in a Pillar Drill making sure it was horizontal in either direction & using a 2.5mm Drill Bit set about removing the old Rivets. I must admit the instructions did warn me that the Alloy was very soft & I had to keep pulling drill bit out and brush off swarf. I lubricated it as per instructions, but was told later by an engineer that the best lubricant for soft alloy was Paraffin (another lesson learnt!)!
Note: Dont think I was supposed to drill all the way thru, but in retrospect it was a good idea as you will see why later on!
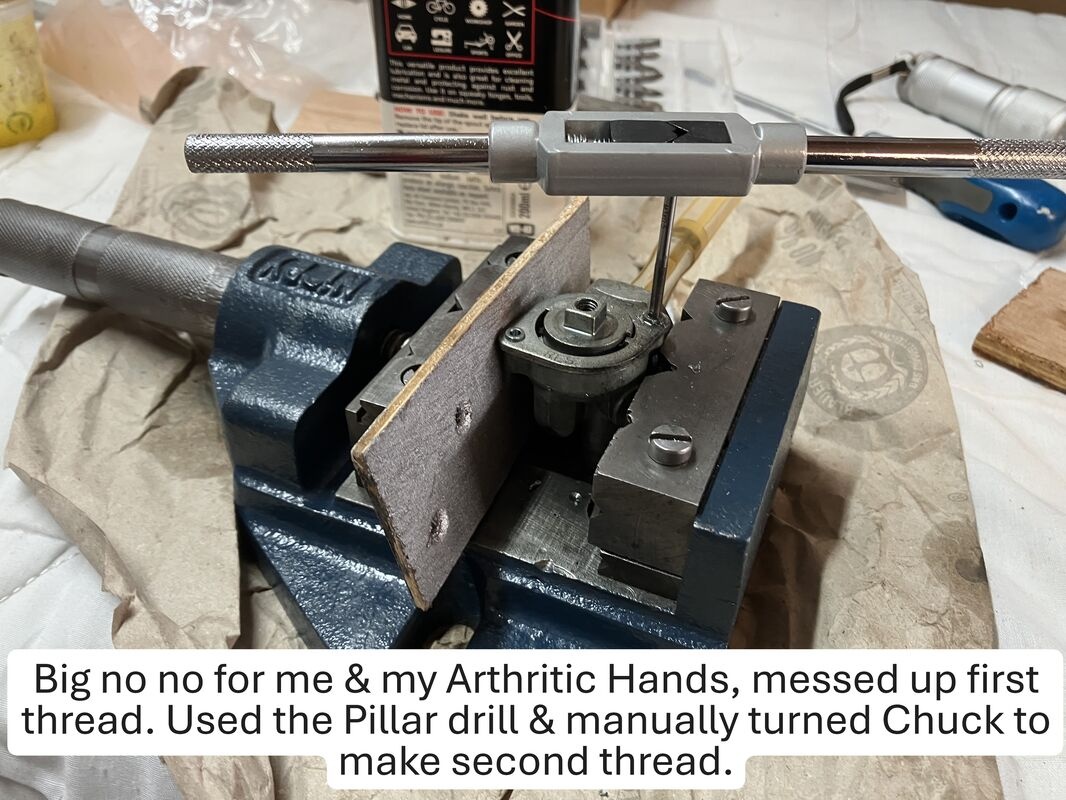
Tried in vain to cut my first thread with my arthritic hands & made a complete mess of it (its a 3mm x 0.5mm Pitch thread). Couldnt maintain a constant pressure and keep the Tap upright so ended up striping what little thread I had achieved.
Second attempt I put the 3mm Tap in the Pillar Drill and with slight but steady downward pressure & turning the Chuck by hand it made a much better thread & helped with the pain in my hands considerably, a WIN WIN as they say.
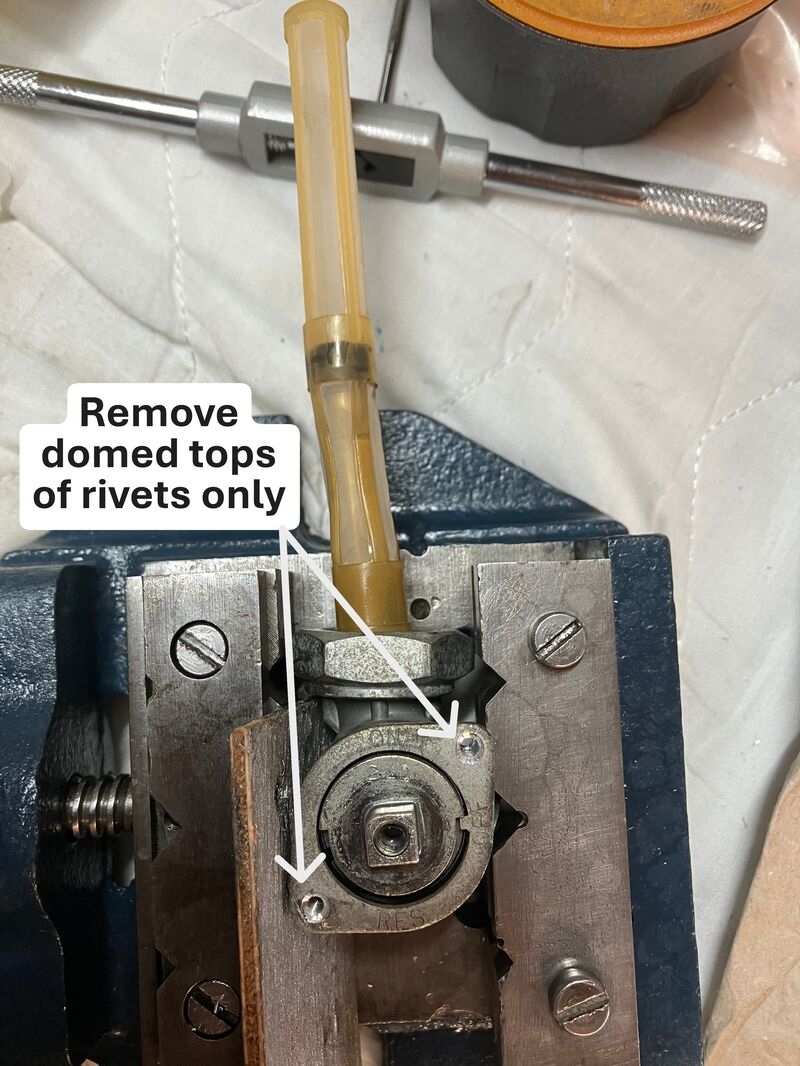
Rivet heads were removed using a larger diameter Drill Bit leaving the bottom part in the bracket to help locate it later