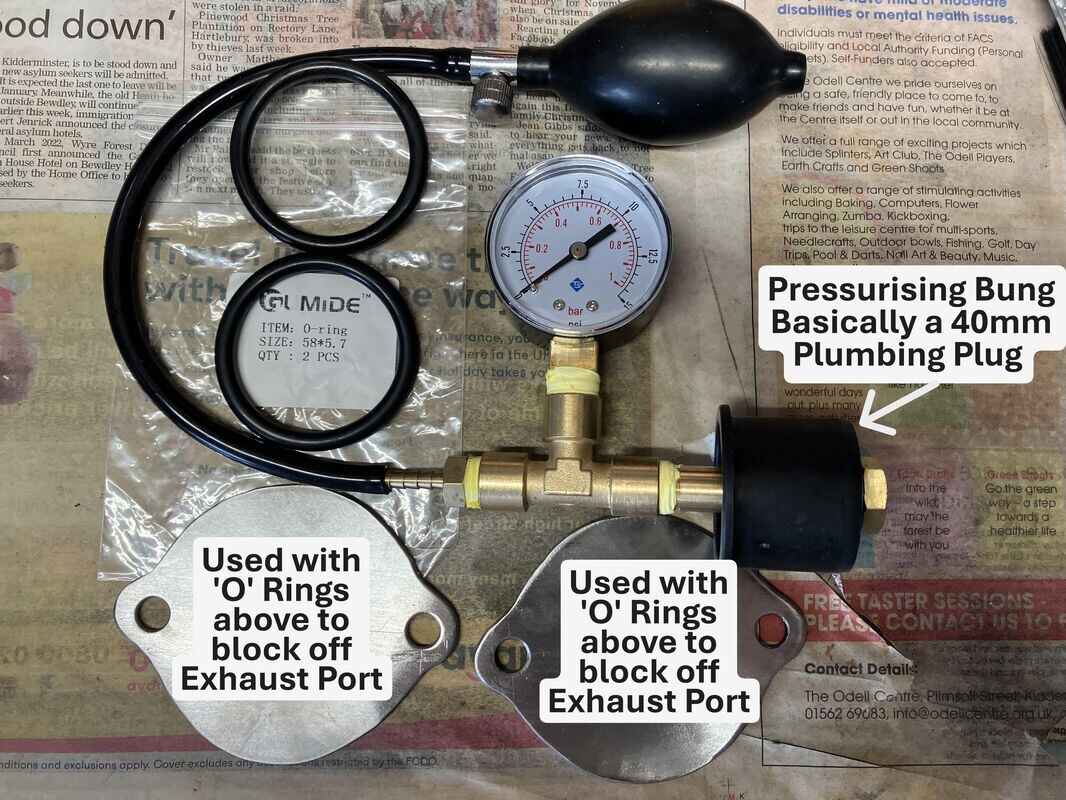
Before installing the Flywheel & Clutch I decided to conduct a Leak Down Test, however, I needed to build one first. The following is my basic attempt of a Leak Down Tester, not the best thing in the world I admit, which was made from the following:
¼ BSP fittings (some parallel fittings BSPP & some Tapered BSPT) including lock nuts;
Inflator Bulb Air Pump;
Low Pressure Gauge 0/15 PSI;
Nitrile Rubber O-Rings;
1/4" BSP Bonded Seal Sealing O-Ring Washers;
40mm Plumbing Socket Plugs;
Fabricated Exhaust & 2T Oil Pump Blanking Plates;
Not to forget some PTFE Gas Tape (Yellow).
I thought it useful to have some notes just in case I decided to do it again further down the road, by which time I would have completely forgotten everything!
A lot of these notes were cribbed off other sites (thanks to NSR WORLD, TYGA, T2 Racing in advance), so I hope they are correct and I havent done anyone a disservice with any inaccuracies, so apologies in advance if I have, please let me know!
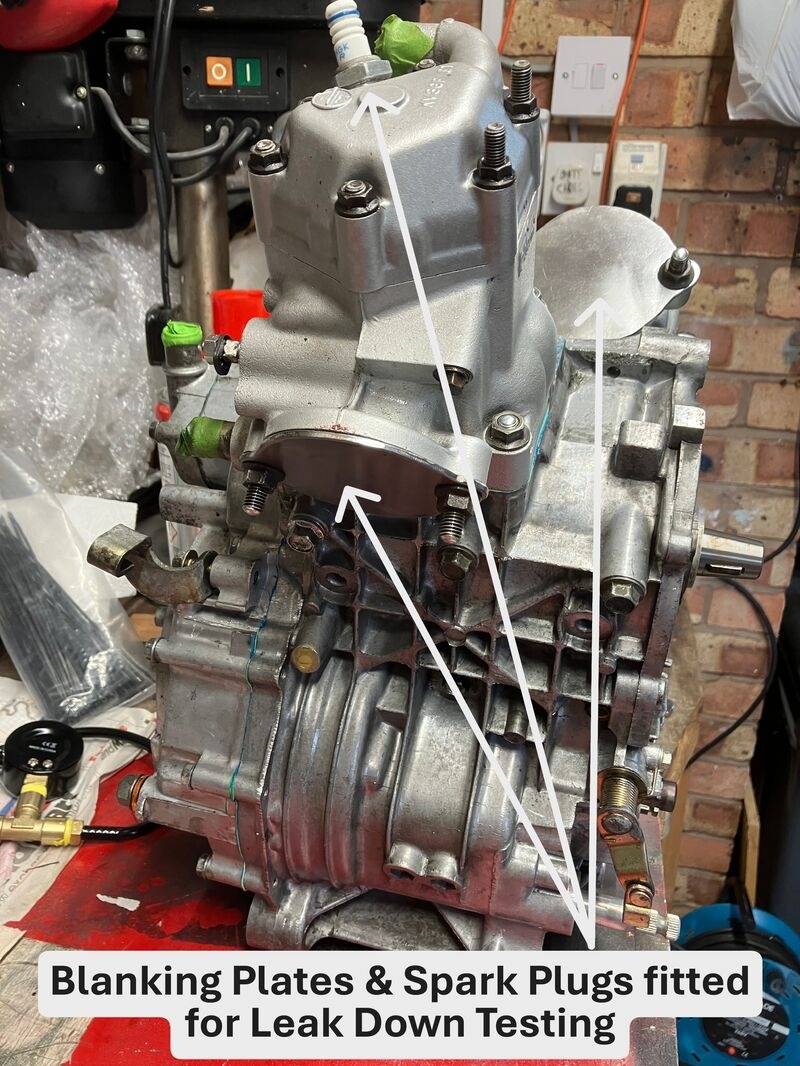
- 1. The 2 Exhaust Ports were sealed using 2 x 5.7mm Rubber O-Rings together with 2 pre-fabricated Exhaust Blanking Plates and tightened up on the Exhaust Port Studs;
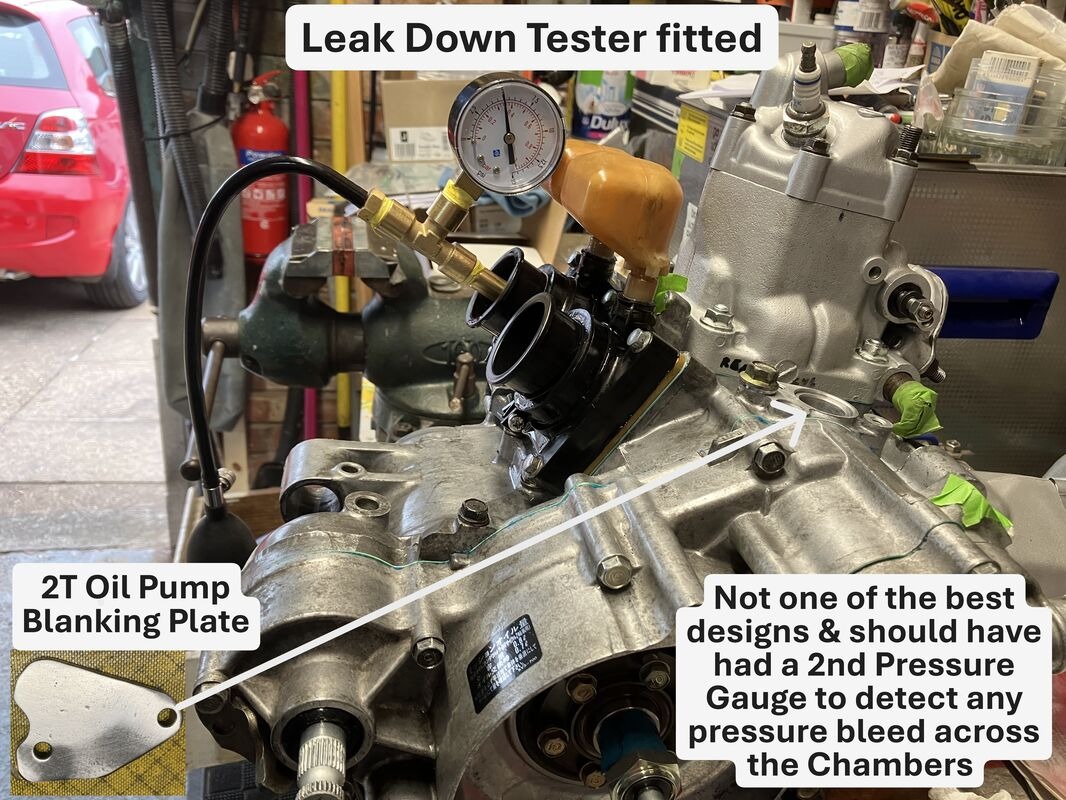
2. Additional Centre Bearing Oilway (for later MC21s or MC28s) where the 2T Oil Pump sits was blanked off with a pre-fabricated Blanking Plate & O-Rings;
3. Leak Down Tester was installed as follows:
- a. the Pressurising Bung is inserted into left side of the Carburettor Insulator and its Band tightened to secure it;
b. Second blanking Bung inserted into the right side of the Carburettor Insulator and its Band tightened to secure it;
c. Spark Plugs tightened to seal the Cylinder Heads;
4. Crankshaft was rotated so that the Piston of the Chamber being pressurised is it at Bottom Dead Centre (BDC);
5. Hand Pump in the Left Crankcase Chamber is pressurised (T2-Racing advise 5 PSI, TYGA advises 10 PSI, members of NSR-WORLD seem to use 7 PSI), I went middle of the road at 7 PSI;
6. Monitored over the 5 Minute period to see if there were any pressure drop (T2-Racing advises no pressure drop at all, or it's less than 0.5 PSI over 5 Minutes);
7. Process 2-6 above was repeated for the Right Crankcase Chamber.
Note: If the leakage is greater than 0.5 PSI:
- 1) check the Gauge on the side thats not being pressurised to see if there has been no leakage thru the Centre Seal (although Andy NSR-WORLD says It's not uncommon to see pressure bleed one way and not the other, because of the nature of the labyrinth seal. In an ideal world it should hold full pressure both ways though) http://www.nsr250.net/forums/viewtopic.php?t=15172&highlight=leak+test;
2) made up some soapy water solution (ROCOL leak detector spray, Shaving Foam are alternatives) and sprayed onto the most likely parts where a leakage could occur, namely the Carburettor Insulator, Left and Righthand Crankshaft Seals, Crankcase joint etc.. to detect where the leakage is occurring.
3) depending where the leak occurs the Engine may require to be completely stripped and re-built to eradicate the leak.
The left-hand Crankcase lost some pressure, but was within acceptable limits, however, the right-hand chamber seemed to lose more than it should (unfortunately, although I did write it all down the timings and pressure loss they seem to have got lost somewhere) so I applied the soap suds to everywhere I could think to see where there could be a leak to no avail.
I really should have had another Guage in the none pressurised Chamber to see if there was any pressure bleed from the pressurised Chamber into the other.
This will be rectified on the Mk2 Leak Down Tester or as they say on Television Lessons to be Learned or more put more bluntly, I should have paid more attention to Note 1 above!!!.